Protect your email address! https://www.kopi.cloud
Kopi - Bring your own domain
Introduction
Use your own domain - avoid being locked in to Kopi or anyone else.
Kopi allows you to use your own registered domain for forwarding mail. If, in the future you no long want to use Kopi, it's a simple matter of changing your MX record to use a different mail service.
Pre-requisites
You must have your own domain registered with a DNS provider. Your DNS provider must allow TXT and MX records to be added to your domain.
The examples below use https://www.cloudns.net as the provider.
Registering your domain with Kopi
You must register your domain with Kopi so that it knows about your domain and so that you will be able to create a forwarder for that domain.
Add a verification DNS record to your domain
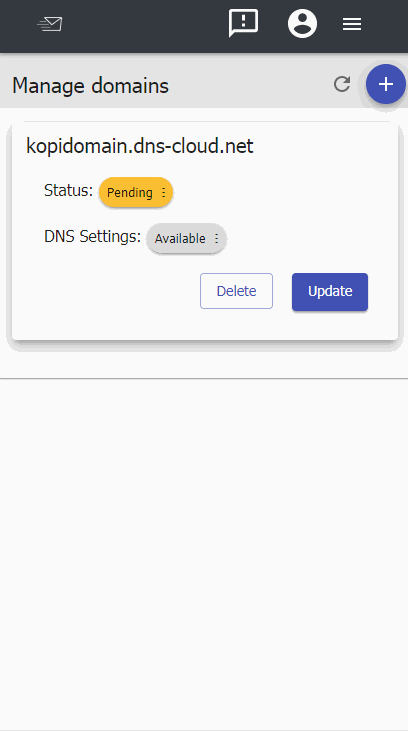
When the domain is first added to Kopi, it will have a status of "Pending" - this means you need to verify the domain.
In order to prove that you control the domain and that you authorize Kopi to handle mail exchange for the domain, you must add a TXT record containing an authorization token.
Click the "DNS settings" button and you will be shown an authorization token:
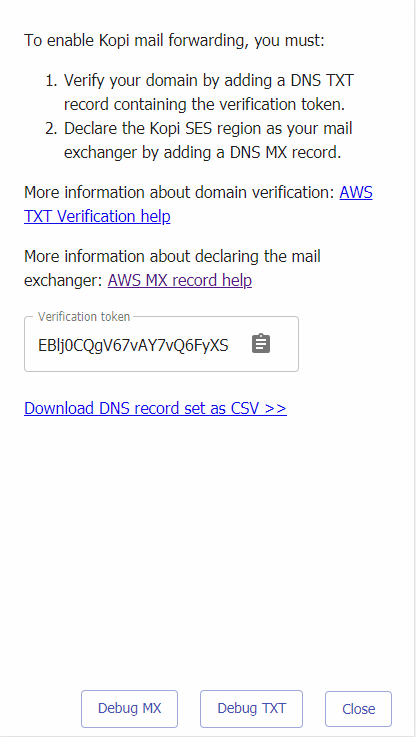
You must add a TXT record containing that token to your domain record set:
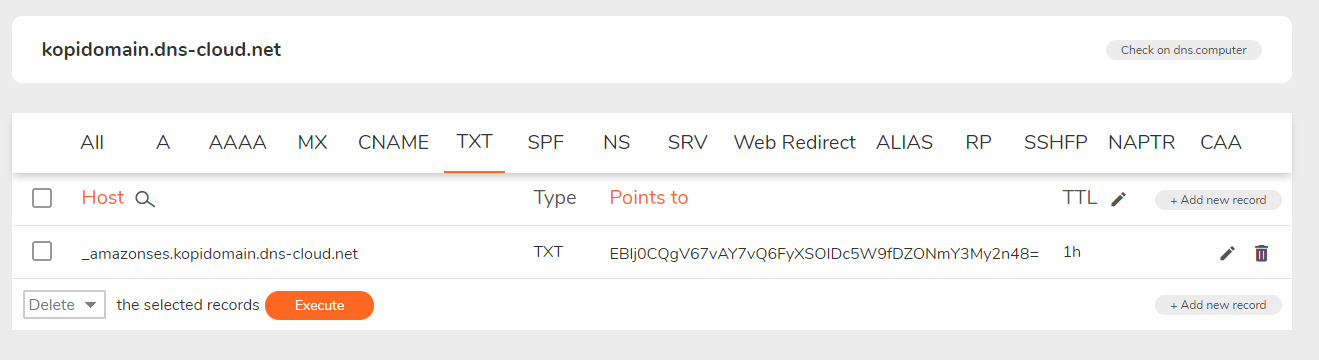
Notice the "_amazonses" prefix sub-domain for the record.
Once you've correctly added the record to your DNS record set, you may need to wait a few minutes for the DNS to propagate and for Kopi to recognise that the domain is verified.
You can click the "Update" button to force Kopi to check the status, but note that even once the DNS record has been made available, Kopi managed domains work via a polling mechanism and it still may take some time for the verification to proceed.
Note that the TXT record must remain available via DNS for the domain remain available. If the authorization record is removed, the domain status will be changed back to "Pending", then after a certain amount of re-tries, the status will change to "Failed".
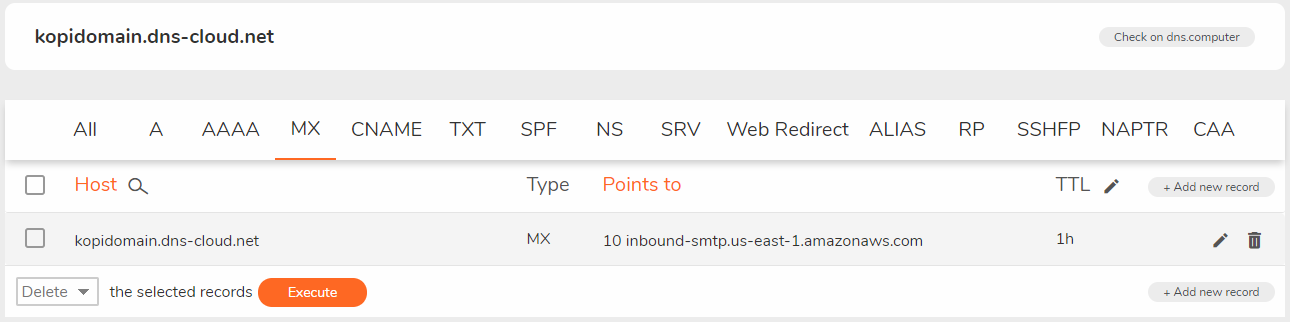
Add a DNS "MX record" to you domain
The next step is to declare that you want to use Kopi as your mail exchanger by publishing an MX record.
Kopi uses AWS SES for forwarding mail of managed domains. You must declare that all mail should be delivered to SES by setting your MX record to point to "inbound-smtp.us-east-1.amazonaws.com"
Using a sub-domain for each Kopi forwarder
You can use Kopi for all sub-domains of your domain by adding a wildcard MX record that declares Kopi as your mail exchanger for all sub-domains. If you're not willing to add a wildcard record you can add an MX record for each sub-domain that you want to use Kopi for.
Examples:
- to use Kopi for all sub-domains (you'll still need to create a Kopi forwarder for each subdomain): *.kopidomain.dns-cloud.net
- any forwarder you create on the "kopidomain.dns-cloud.net" domain would forward mail addressed to either "slug-keyword@kopidomain.dns-cloud.net" or "slug@keyword.kopidomain.dns-cloud.net"
- to use Kopi for a single "mail" sub-domain:
- create a forwarder with the key "mail" and the domain "kopidomain.dns-cloud.net"
- add a DNS MX record for "mail.kopidomain.dns-cloud.net"
Create your Kopi forwarder
After your domain is correctly configured, you need to create a forwarder.
Note that your domain is now an option in the "domain" dropdown.
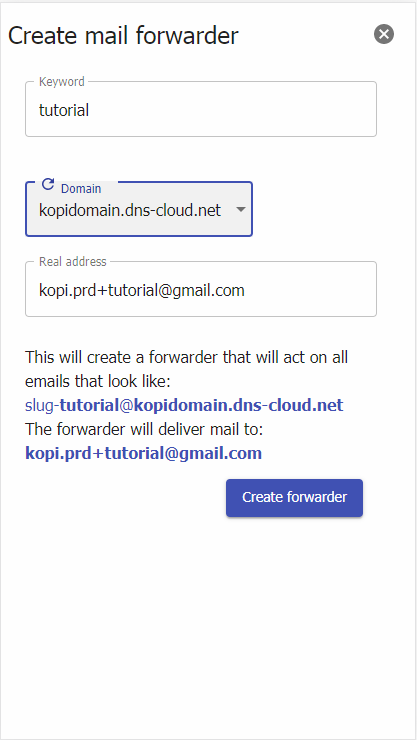
Given the example above, an email sent to "test-tutorial@kopidomain.dns-cloud.net" would be forwarded by Kopi.
Protect your email address! https://www.kopi.cloud